How to install solar street light-solar street light installation steps
Most of today’s solar street lights use high-end LED light sources. Compared with traditional high-pressure sodium lamps, these lamps have a longer lifespan, are energy-saving and environmentally friendly, and have higher power supply efficiency. Moreover, they are simpler to install, but they are simple. It does not mean that you can be careless. You still have to be careful when installing. Let’s take a closer look at how to install solar street lights.In this article, ZGSM will tell you how to install solar street lights and guide you step by step.
How to install solar street light
Install the solar street lamp arm
There is an exposed sheathed wire on the lower light pole. You can use thin wire to tie the wire end tightly and wrap it with black tape to facilitate pulling out later. Use the thin wire to slowly pull out the thin wire, leaving a section at the top. Lamp cord makes it easier to install the lamp head later.
There is a thread hole reserved on the light pole. Pass the other end of the sheathed wire out from here and follow it to the top end of the light pole. At the same time, pay attention to the lamp arm assembly to be close to the lower light pole until the upper panel is in contact with the lower light pole. Align and close the boss of the lamp arm, then use appropriate bolts to fasten the lamp arm assembly to the lower lamp pole, and then disconnect the thin iron wire from the sheathed wire.
Install light fixtures
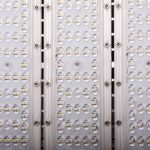
How to install solar street light, after installing the light arm, you can install the light fixture. The first thing to do is to check whether the parameters of the lamps, including wattage, color temperature and spectrum, meet the requirements of the project involved to ensure the lighting effect. If it does not comply, it needs to be replaced in time. In addition, the model, specifications and other parameters of the light source, as well as other aspects such as quantity, also need to be considered, otherwise it will cause a mismatch between the solar controller and the LED light source, causing the lamp to not light up or the light source to burn out.
Because each lighting system is an independent working unit, the time for switching lights is also different, and the power of the lights is different, and the lighting duration is also different. Therefore, the light source parameters cannot be changed at will during installation, otherwise malfunctions may occur during subsequent use. 㤉 Oh, replacement must also be replaced with matching identical lamps.
After that, bring the opened lamp close to the upper end of the lamp arm, pass the tail of the sheathed wire reserved at the top of the lamp into the lamp, and block it on the terminal block inside the lamp. At the same time, connect the lamp to the lamp arm and install it securely.
During this process, be sure to ensure that the positive and negative poles of the wiring related to the lamp are connected correctly. After installation, it is best to test it to see if there is any problem with the light source or circuit, and then investigate and solve the cause.
Wiring
We commonly use aluminum wires and copper wires. It is recommended to use double-core sheathed copper wires because the resistivity of copper wires is about 1.68 times lower than that of aluminum wires and can show better electrical and thermal conductivity. properties, lower electrical losses, the maximum safe energizing current is higher than that of aluminum wires, and copper wires have better fatigue resistance and can be bent repeatedly without breaking. In addition, they are more corrosion-resistant and have a longer service life.
When wiring, use the lamp arm as the center of gravity to transfer the wire to the lamp, ensuring that the lampshade is facing the ground. During this process, you must strictly follow the wiring diagram for wiring, do not change the connection method without permission, and pay attention to the positive and negative poles ( Do not reverse the connections (usually color-coded), and the voltage levels must match each other.
Before installation and lifting, it is necessary to test the lamp to see if it can light up, so as to avoid problems discovered later that will increase the difficulty and cost of repair.
Precautions:
Lamp height – determined according to specific road conditions and lighting requirements. The height of all lamps should be consistent;
The length of the lamp arm should not exceed 1/4 of the installation height. First, too long will reduce the illumination on the side where the lamp is installed. Second, the load-bearing capacity will change, and the mechanical strength requirements of the lamp arm will become higher, increasing the cost and affecting the Use, use, and not beautiful.
Elevation angle – should not exceed 15°. Theoretically, although the greater the elevation angle, the larger the lateral illumination range of the road surface, it will also increase glare and reduce the brightness of slow lanes and sidewalks, making it unsafe to drive on them.
Author
ZGSM Solar
We are a professional solar street light manufacturer with a 20-year history.

Latest
- What are the Common Problems with LED lights source and solutions?

- 3 Crucial Factors for Selecting LED Light Sources for Solar Street Lights

- What are the composition of lithium battery for solar street light?
- 5 Key Factors Influencing Solar Street Light Prices
- Secondary Optical Design Of Solar Street Lights